
…and a few new revelations!
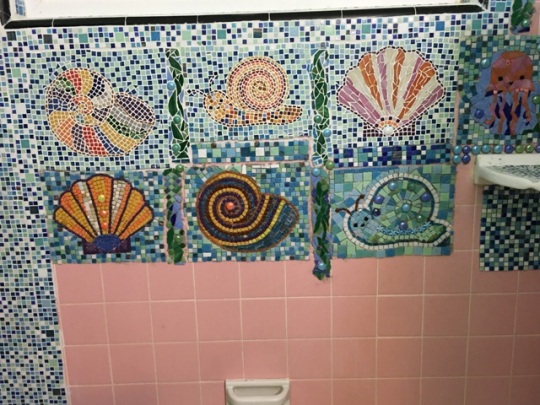
 With all of Foster and Panda’s recent adventures, you may have thought I had forgotten about the epic sea animal project that’s been going on in my bathroom.
 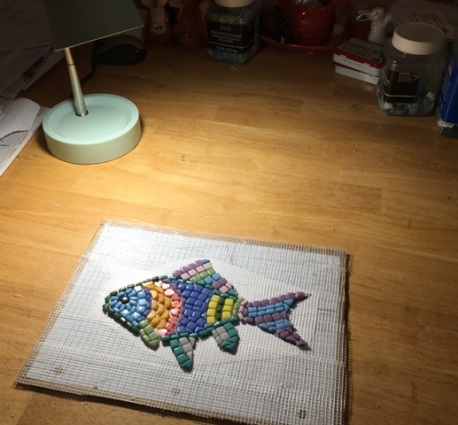 But nothing could be farther from the truth! The first thing I would like to share is that I finally went to Target and spent $6.99 for a small desk lamp. Yes, after all this time I realized that if I had a lamp on the table, it might not be so hard to do mosaics at night, since my overhead light in that room isn’t very bright. Still, with the lamp on, my photographs don’t come out as well so I have to turn it off to take my “blog photos”.


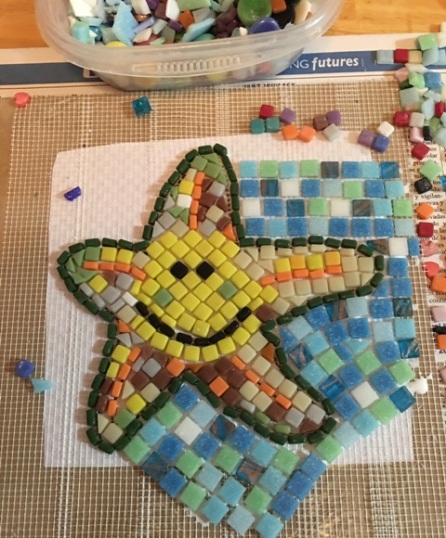 A whimsical starfish also seemed to be in order.


 Some strips of “seaweed” between them.
 Starting the third row.
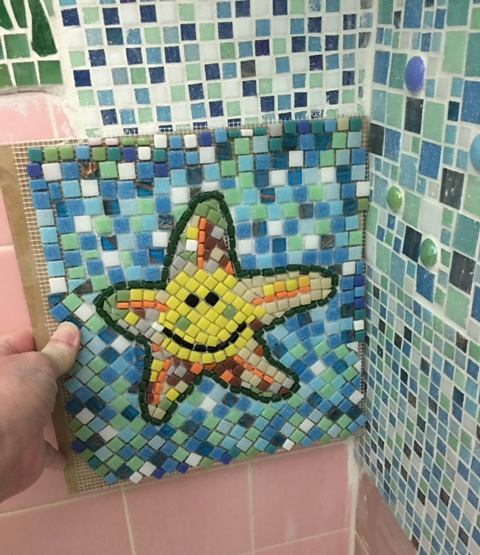 I wasn’t sure if I liked the starfish that much so I put him in the corner under the soap dish.
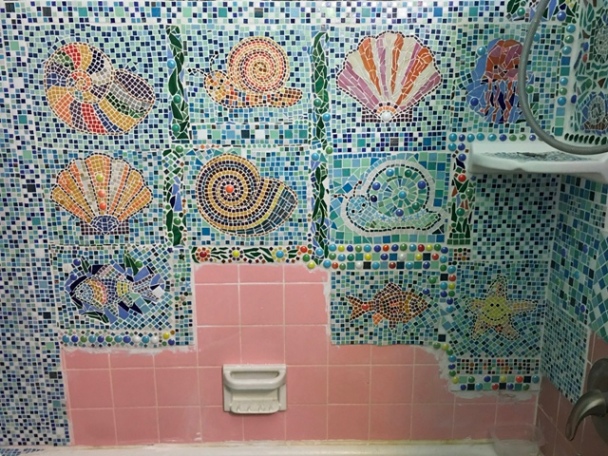 Eventually there was only room for one more sea animal. I had already decided the bottom spaces were just going to be random patterns because I was “done” with sea animals. But there needed to be one in the space above the soap dish. What should it be?
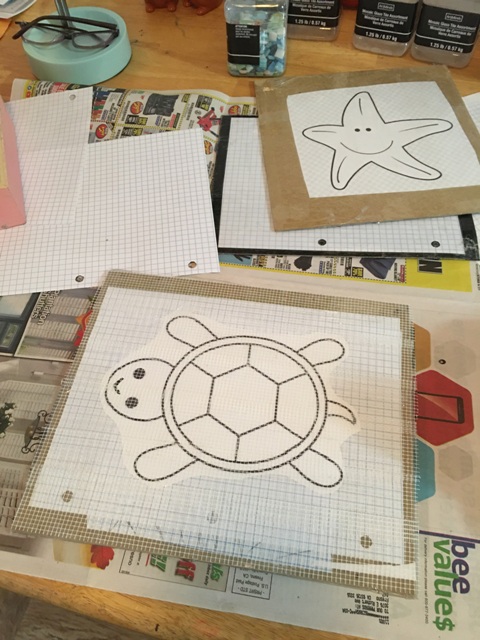 After a bit of consideration, I decided on a sea turtle. It was about this time (yes, I know, on the very last sea animal) that I had a sort of “mosaic epiphany” with regard to the background squares. Up until now, I had been struggling with getting the sides of the different rectangles to line up easily.
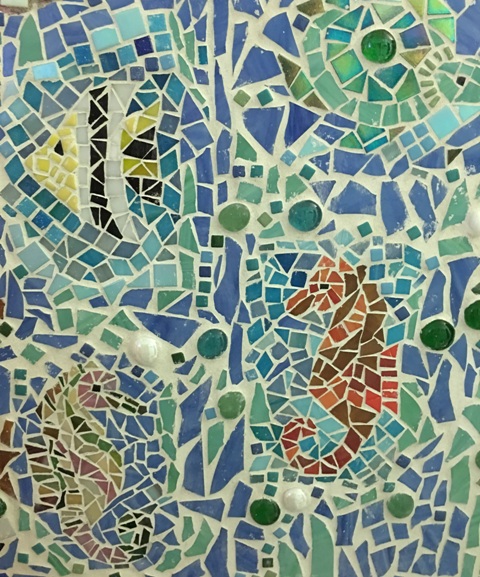 If you remember, the sea animals I had done on the first walls (see “Because I Can”) were quite a bit smaller, placed somewhat randomly with more space between them. But since this wall was so much bigger, I was not in the mood to make enough small sea animals to cover it. I decided to go with larger panels instead.
 As you can see here, it seemed the edges of the individual panels were always jagged, forming uneven spaces between them. This resulted in my having to insert tiny, odd shaped pieces in the spaces to make this “mistake” not so obvious. Scroll back to the pictures of the previous sea animals, now that you know what to look for, and you’ll get a better idea of what I’m talking about.
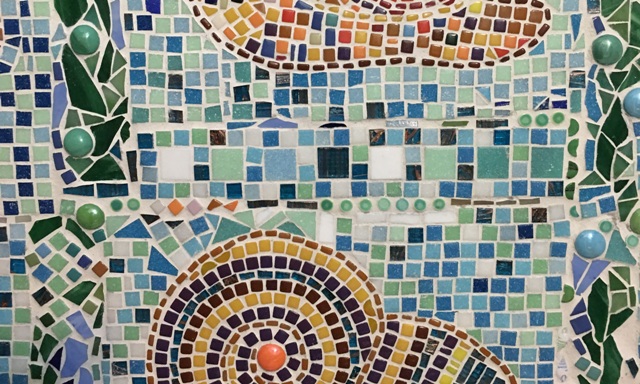 Here you can see the result, which doesn’t look that bad, but there still had to be a better way. It was when I finished the sea turtle that it dawned on me…
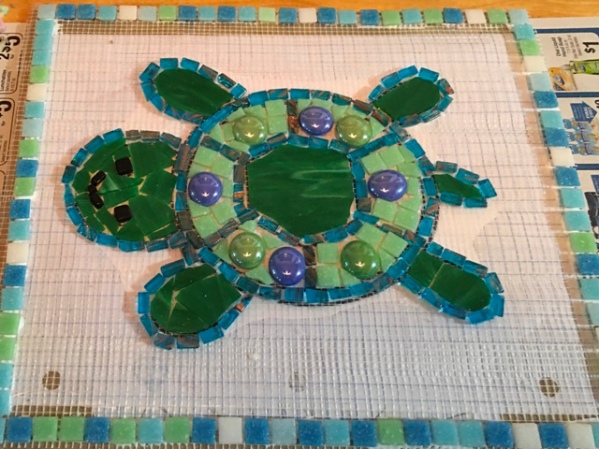 Why not start with the border and work your way in, rather than the other way around? A novel concept!
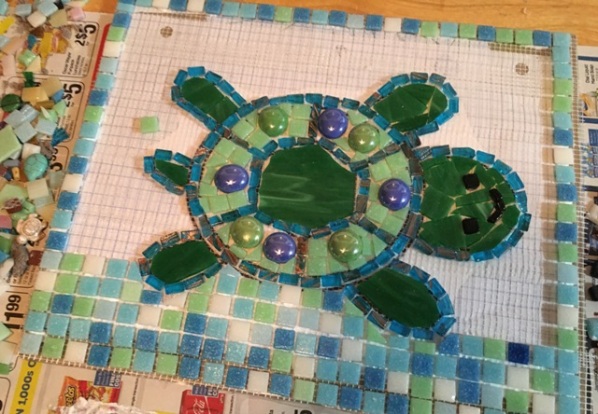 I worked my way from the border to the turtle instead of from the turtle outward.
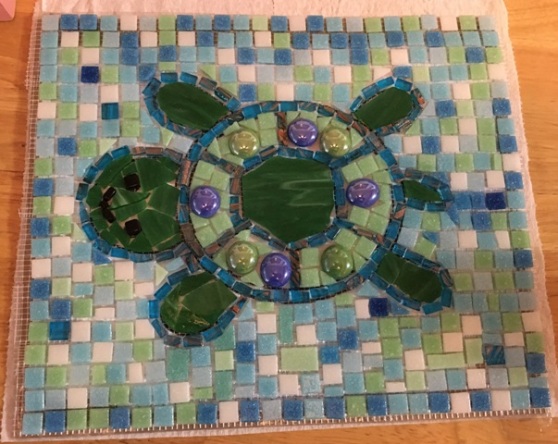 It turned out SO much better!
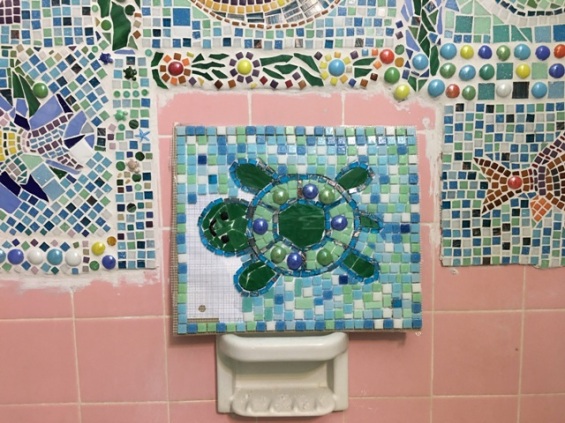 Checking for size before it was quite finished.
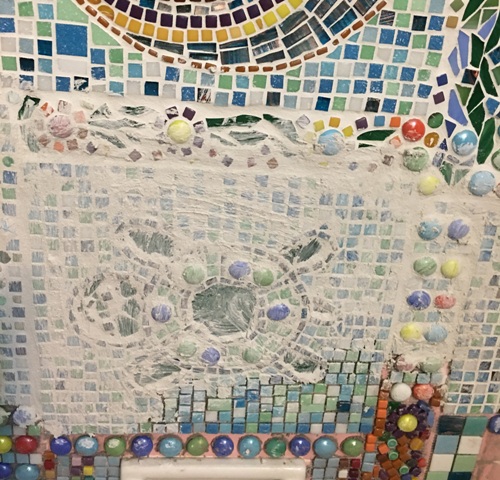 Another thing that dawned on me was that I didn’t think I’d shown you much about the grouting process. Besides making the actual designs, grouting is my favorite part. Attaching the panels to the wall with Thinset mortar is my very least favorite part.
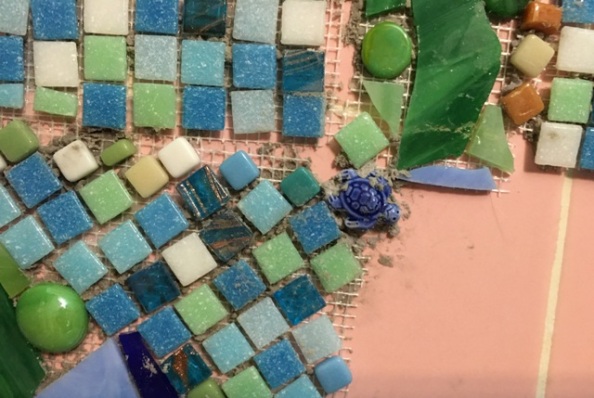 Mortar is an absolute pain! I might still be doing it wrong, and that could be part of the problem. You can see how it oozes up from between the tiles and if you don’t remove that right away with something like a paper clip or a tiny screw driver, it will dry and become even harder to get off. But if you aren’t careful, you can dislodge a tiny piece and then it’s even harder to put back in. Anyway, back to the good part.
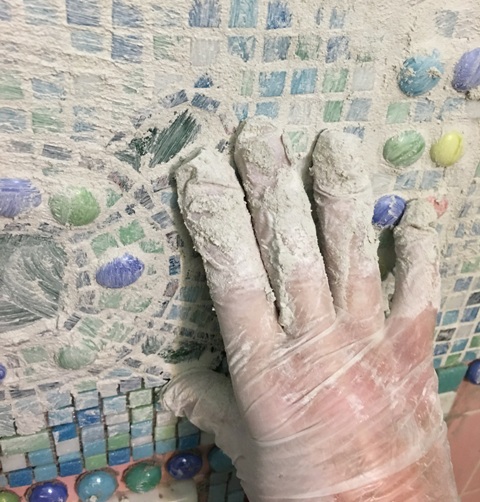 After you have let your Thinset dry for at least 24 hours, it’s time to apply the grout. You have to make sure it squishes all the way down between the tiles. It’s best to wear gloves because the grout really dries out your hands. Plus you can’t wash your hands in the sink because you don’t want all that grout to clog up your drain.
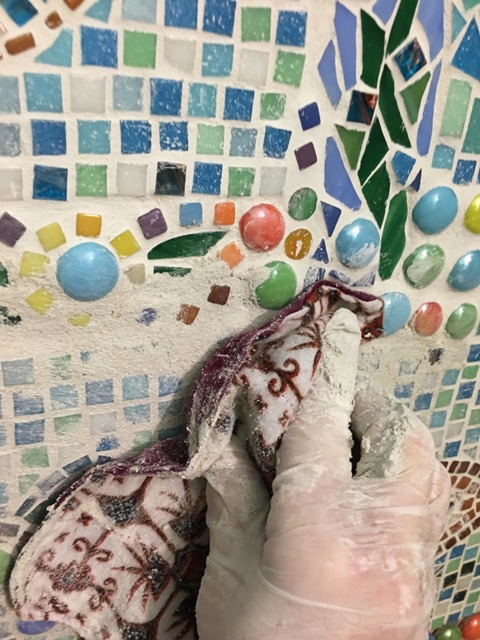 You will need to wipe off the excess grout with a damp cloth as you go, and if you aren’t careful you could dislodge a tile or two that didn’t get “mortared” down completely. I might point out here that all my project posts are DIM (Did It Myself) as opposed to DIY, or Do It Yourself. This means that, (having been raised by Swedes), I am just cautious enough to state that I will not be responsible if somebody tries it my way and something goes wrong. There is always, after all, “an element of risk.” (Also if you are going to take your own pictures with your phone, just be sure not to get grout on it. Be extra careful if you are right handed and you are taking the pictures with your left.) Just saying.
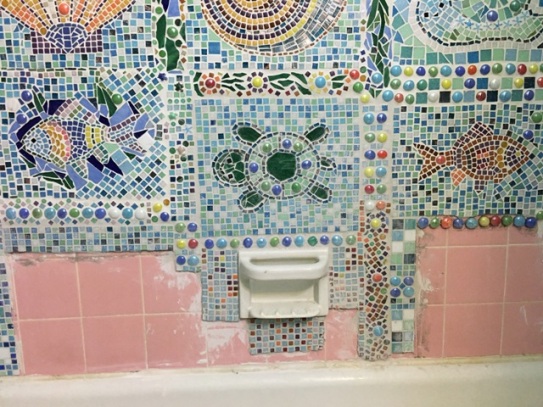 After you have wiped off the excess grout to the best of your ability, wait awhile, like a few hours or maybe until the next day, and go back over it carefully with a cloth and white vinegar mixed with water. I used a small screwdriver to chip off any stubborn grout or mortar that is still stuck on the tiles. This photo shows the section before the excess grout was cleaned off.
 And here it is, all cleaned off! If you look carefully at the soap dish you will see two tiles that came off during this process. I’ll think about that later.


It’s coming along really well Debbie. You are one talented lady!!!
Aww thanks! I’m about ready to have this project finished! 😜
So very beautiful! 🐟🐠🐙
Thank you so much!🐠🦀🐳🐌
I love this project, Debra! It looks so, so cool and I’m fascinated by the whole journey you’ve undertaken. Your little turtle is very special, too!
Thanks Chris! “Journey” is a great word for it (leave it to the writer LOL) I can hardly wait till it’s finished though! And yes I think I like the turtle best of all🐢
WOW!! What a wonderful transformation. It looks fun & inviting.
It’s been fun, but it’s been a long project! 😊
Very lovely and wonderful artwork. The tiles look great!
Thanks! 😀
It looks great.
Thanks!