
Yay!
 The sea animals are finished!
  It’s taken just over a year, but we finally made it! So let’s take a few minutes to review the project, and share a few more bits of mosaic info I’ve learned along the way.
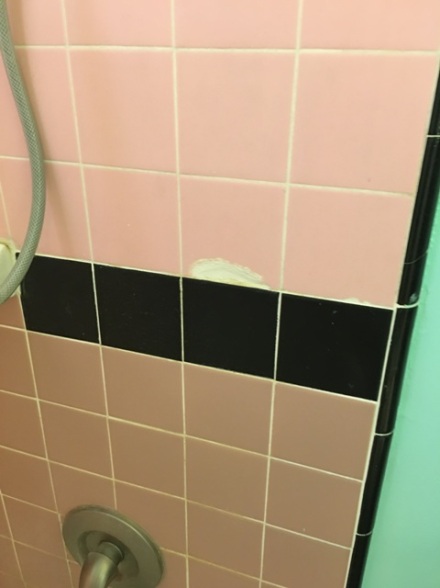 This photo, taken on February 10 of last year, shows one of the reasons why I thought it would be okay to experiment with a mosaic on my bathroom tile. We’d had the faucet and shower head replaced years ago, and that had made it necessary to tear out some of the pink tile. Then when it came time to replace it, we couldn’t match the color exactly. To make it less obvious we had put the strip of black tiles between the two pinks. This had never really bothered me, because I have a tendency to look but not really see things (like the kid in the back row whose shirt is out of dress code, but that’s another story).
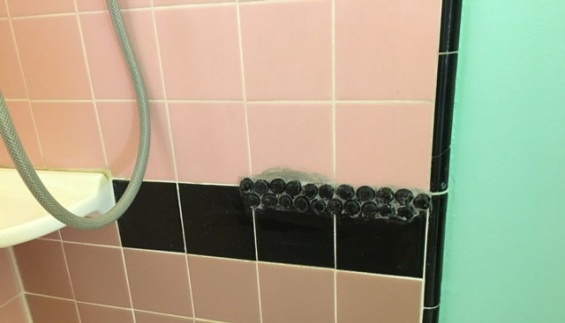 So I asked myself, what happens if I put some black glass gems over the chipped part?
 Then I thought, how about some white gems, and some “water” and “seaweed?” And only because it might help someone in the future, I didn’t crop out the “first fish”, although he didn’t stay up there long. I had read an article about a mosaic artist named Frances Green, who did an incredible mosaic on her entire bathroom and had affixed each tile individually to the walls by hand. Sounds easy enough, I thought, let’s just make a fish! Okay, so I was wrong.
 That’s how I learned that I would be better off doing small sections of mosaic on fiberglass mesh and then affixing that to the wall with Thinset mortar. All this can be seen in more detail if you go back to the first post on this project, “Because I Can“.
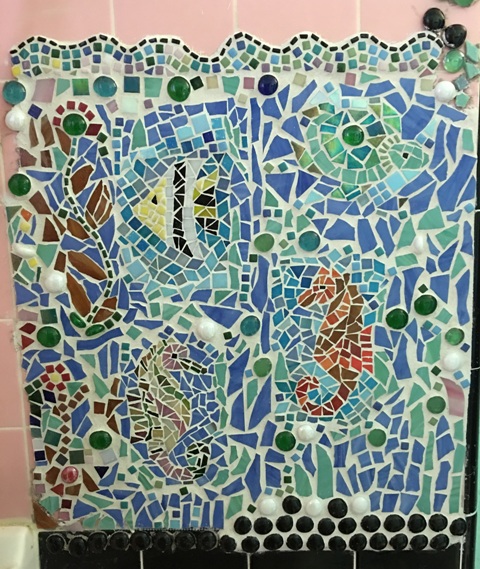 This was actually as far as I was going to go with the design at first.


But we all knew that wasn’t going to happen… But wait, what happened the black gems?


Well, the truth is, the more I added to the “sea animals” mosaic, the less the black gems seemed to fit in. While I’m sure there are black gems somewhere under the sea, they just didn’t look good in mine.


So finally I made the executive decision. The black gems would have to go. Now I have discovered that you can remove mosaic pieces, even when they have been in place for a year. You just need a hammer and a large but short screwdriver. (Disclaimer for those not raised by Swedes: don’t try this at home!)


My next idea was to put up some random geometric patterns, somewhat reminiscent of quilt patterns. But when I got them on the wall, it looked like some kind of writing. One person I texted the photo to actually thought it was supposed to be a word. I knew that was going to bug me more than the black glass gems would have. As an FYI, if you catch it soon enough, you can peel sections of mosaic off the wall after they have been affixed with Thinset. Just do it before it has a chance to dry.
 There, that’s much better!
 Eventually that section got finished.


Somewhere along the line I discovered that beads from the jewelry making section at craft stores can make really good mosaic pieces. I’ve used beads in other projects but have primarily stayed with the flat ones. This time I tried adding some shaped ones, with varying degrees of success.


Another thing I discovered was that once you have done your pattern on the mesh, the glue will dry much faster if you are able to peel the mesh off the background and let it dry upside down. But you have to wait until the glue is somewhat dry or your pieces will just fall off.


Another bit of info that may prove valuable: My original system had been to take the pieces of mesh into the bathroom and cut out the designs as I needed them, in between putting them up with the Thinset, which seriously ruined my pair or “non-sewing scissors.” As an FYI, in case you’ve ever thought of trying it, it’s kind of hard to use scissors with Thinset mortar on your hands. A couple of weeks before finishing the project, it dawned on me that it would be better to trim around the pieces first, and then take them into the bathroom to put them up! 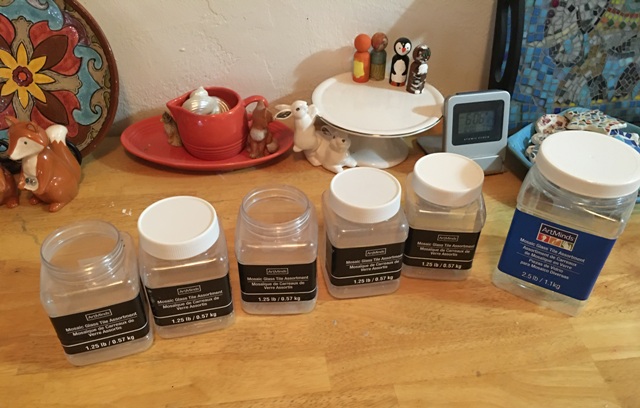 In “Sea Animals Update” on March 10, I asked the question, “How many packs of little blue squares would it take to cover an entire shower wall?” Well, this isn’t even all of them. And besides the tiles that come in the little plastic jars, I went online and ordered several bags of different blues, whites, and greens at different times throughout the project.
 And then, just before the social distancing quarantine went into effect, I “scored” on a bunch of tiles on clearance at the craft store. They were marked down from $4.99 each to $1.29, so I got six bags. People have asked me how much it cost to do this project, and to be honest I’m not sure I even want to know. But when you just get a few things at a time, throughout a whole year, you don’t notice it as much. I guess I could have kept the receipts but, I didn’t…Not nearly that methodical, I seem to remember having said…


I decided it would be cool to “sign” my work so I figured I could use these metal beads. But they turned out not to be metal, and the “metal” part scrubbed off with the grout, leaving only part of the black paint in grooves of the letters. Oh well, I will figure something out. Maybe a very thin permanent marker, but I’ll worry about that later.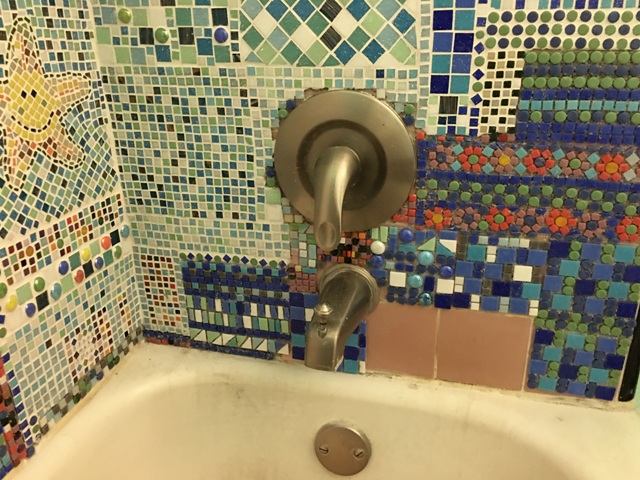 And finally there was just one little part left.


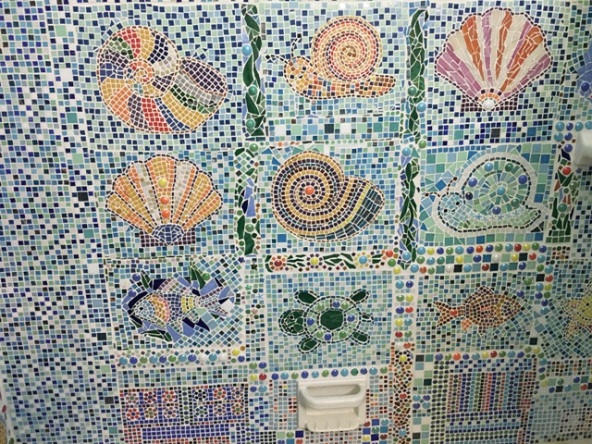
Once you get to the bottom section of a mosaic like this, you are going to have to sit down in the tub. Probably good to have on clothes that you don’t mind getting grout and mortar on. And here is the finished product! If you notice there is a small pink square up by the shower head, but I’m leaving it that way. The goal is to paint it blue with some kind of paint that sticks on tile. One of these days.


To me, this project has been like a giant doodle drawing only with glass gems and mosaic tiles. I literally “made it up as I went along,” which may not be everyone’s way of doing things. But it works for me!

Congratulations! What an adventure!! You’ve created a beauiful and unique work of art!
Thanks! It was really fun, but I’m glad it’s finally finished😀
Finished is good!! 😁
It’s been fascinating watching you work on this and it looks brilliant! Well done for finishing too. You should be very proud of yourself. I hope we don’t need to worry that you have enough art supplies to tide you over the coming weeks… 😉
Keep well, Debra
Thanks Chris! I’m glad you have enjoyed the “adventure” this has been! As for art supplies, it’s probably a good thing we’re in lockdown, so I’ll be forced to use up all the stuff I already have around here instead of buying more! 😋
WOW – great job!!
Thanks so much! I hope you are doing well! 😊
Congratulations and a very artistic job indeed. Then again you really had a great assistant. He had all four paws to help you/
Thanks! Yes my assistant certainly was a lot of help! One good thing was, I was forced to clean up after myself constantly because I didn’t want him to get into anything that could hurt him, like glass chips or grout powder 😀🐱
It looks great.
Thank you so much! 😀
Oh my Good!! It looks absolutely fantastic!! You are amazing congratulation to complete this fantastic project, I love it! Take care !
Thanks Dora! I’m glad you like it! Thanks for visiting my blog😊 Stay safe!