
About 5 or 6 years before I retired from teaching…
 …I asked an eighth grade girl why she was doing whatever she was doing in my class. (I don’t remember what it was now, you can fill in the blank: texting on her phone, playing games on her tablet, talking to her friends, doing her math instead of Spanish, it could have been anything.) Her response was “Because I can.”
  Ouch! But since I was never the best at classroom discipline, she was probably right. Still, I’ve always remembered that phrase, and the student, with a certain degree of fondness.
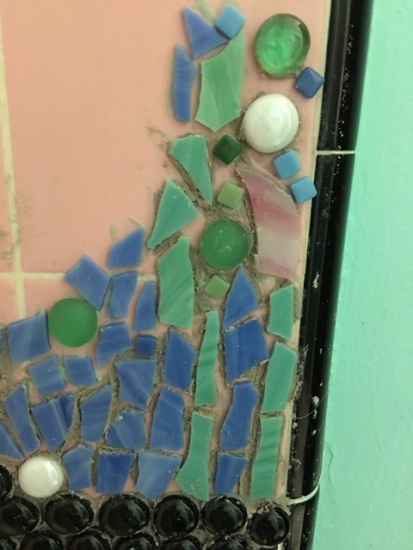 So, when I got the idea to do an undersea mosaic on the ancient pink tile in my bathroom, I wondered if anyone would question me as to why. The answer came to me immediately: Because I can!
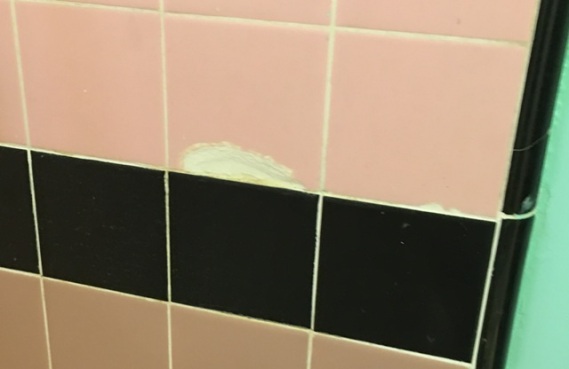 There was already a chip in the tile, and if you notice, the top pink and the bottom pink don’t match. That’s because years ago we replaced the bathtub/shower faucet and that involved breaking some of the pink tile out. Then we couldn’t find the exact same color to replace them with. These imperfections never bothered me, but since they were there it wasn’t like I could make it look any worse by adding some glass gems…


I had been reading about Thinset mortar, and lo and behold, they had some at Carlos’s store. (For those of you just joining us, Carlos doesn’t own the store, he just works there, but it will always be “Carlos’s Store” to me. You can see Carlos in “Not Really Silver” in case you’re wondering who exactly I’m talking about.)


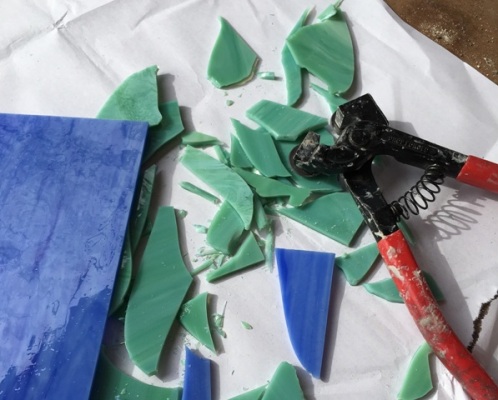 Around this time I had also figured out that if I bought sheets of glass at Hobby Lobby, I could cut them with my tile nippers and get tons of mosaic tiles for much less than it would cost me to but them in the little bags. Granted, the ones in the little bags are already square, but if I wanted squares, I could make them with a bit of time and patience. But for what I wanted to do, the shapes you see her would work just fine.
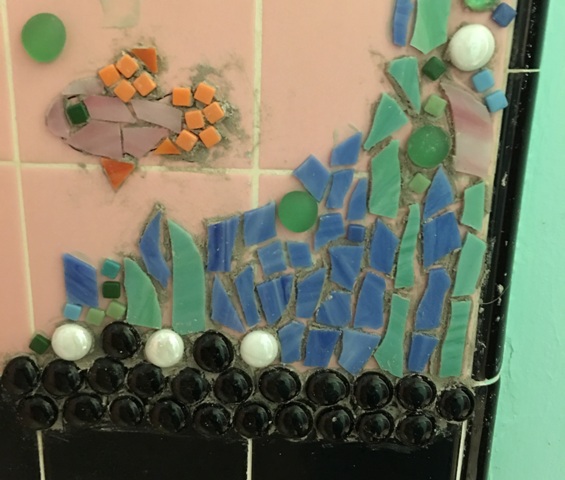 I quickly learned that you don’t just mosaic sea animals freehand. This picture is called “The First Fish”. I almost didn’t want to show you this one, but since I am a staunch supporter of “truth in blogging”, I felt it was only right. The water and seaweed looked okay to me, but the fish would have to go. Don’t even ask what kind of fish it was supposed to be. Fortunately I was able to chip him off of there before the mortar became permanent. So how are you supposed to do this?
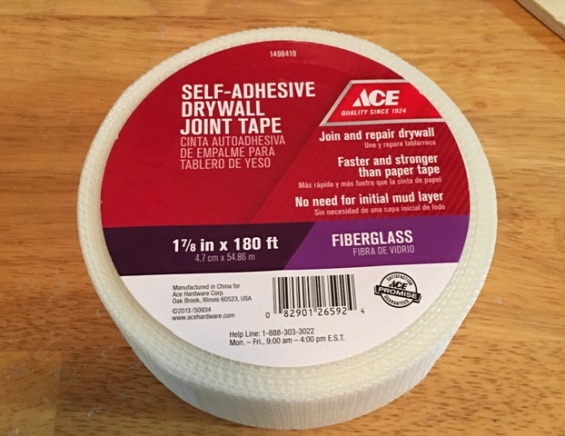 I read several articles on Pinterest, and discovered there is sticky, fiberglass mesh you use to do mosaics that you want to attach to a vertical surface. A quick online search revealed that you pretty much have to order the stuff online from mosaic companies. You already know that I was not going to wait for an Amazon order just so I could start my sea animals. I figured there had to be another way. Then it dawned on me: there had to be tape out there somewhere that would work just as well. It wouldn’t be very wide, but I could put several strips together. Sure enough, I found it at Carlos’s store.


So what you do is draw your design on a piece of paper. Then you tape down the drawing and place plastic wrap over it. Put the fiberglass mesh over the plastic wrap sticky side down, and then glue your tiles onto it. I used Liquid Nails for this part. When the glue is dry, you peel off your mosaic, cut off any excess mesh, and stick it to the wall with Thinset.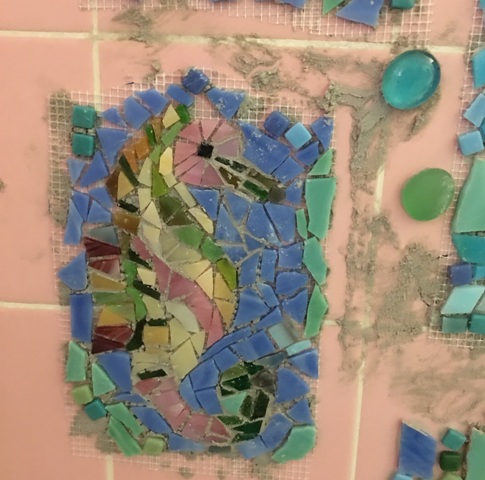 I also read where you can lay your fiberglass mesh down sticky side up, and just use the sticky stuff to hold down your tiles. I tried it that way on the second seahorse, but I liked the first way better. The tiles on this one didn’t stay on as well as they did with the glue. You can see where one of the tiles on the top of his head fell out.


I thought the angel fish turned out pretty well.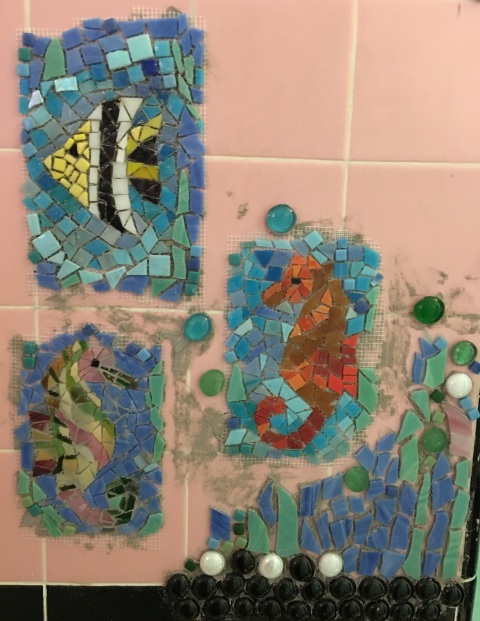 So here are the first three affixed to the wall. When you press your mosaic onto the wall, the mortar kind of seeps out through the holes in the mesh. I tried to get most of it out with a teeny, tiny screwdriver, the kind you use for glasses frames.
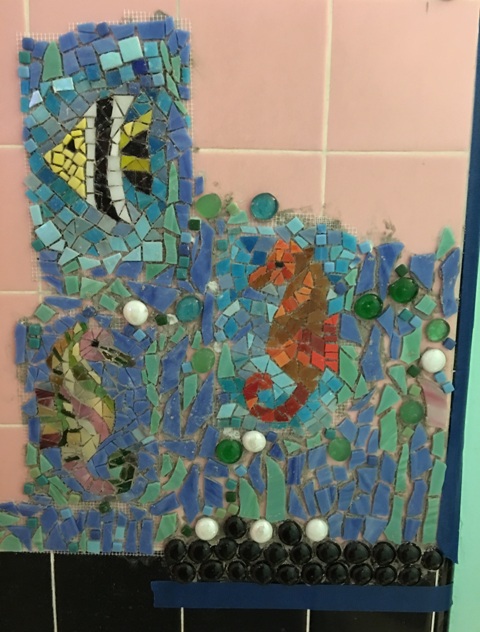 Next it was a matter of filling in the spaces between them. This part was easy because the pieces were bigger, and I could just stick them straight onto the wall with Thinset. I just randomly placed the green and blue glass pieces and added some glass gems here and there.
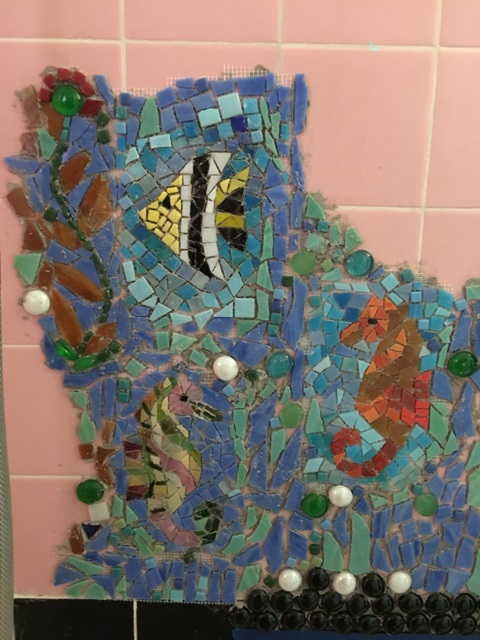 That’s supposed to be seaweed at the upper left.
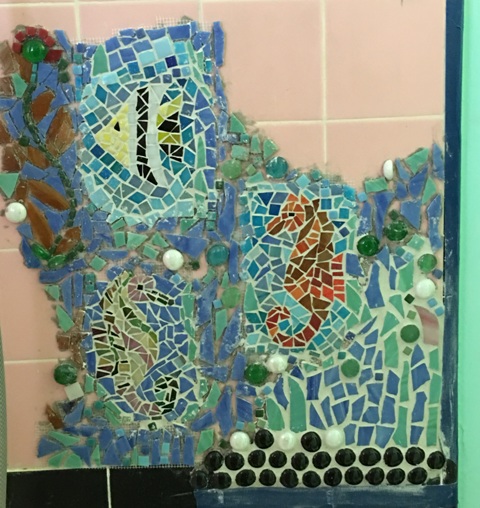 Never one to wait until the end of a project to start grouting it, I had to find out how it was going to look.
 So I grouted as I went, every few sections. You have to wait 24 hours for the mortar to dry before you can grout, so this took several days.
 Of course there had to be a turtle!
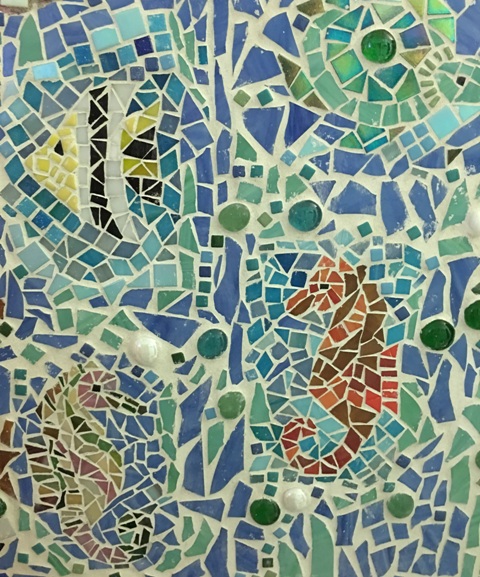 So here they all are, before the grout and excess mortar were totally cleaned off. It turns out white vinegar does take grout off mosaic tiles. It was a slow and tedious process, but eventually I got it pretty well cleaned up. (Not that it worked on “The Amazing Chocolate Mosaic Vase,” but anyway. )
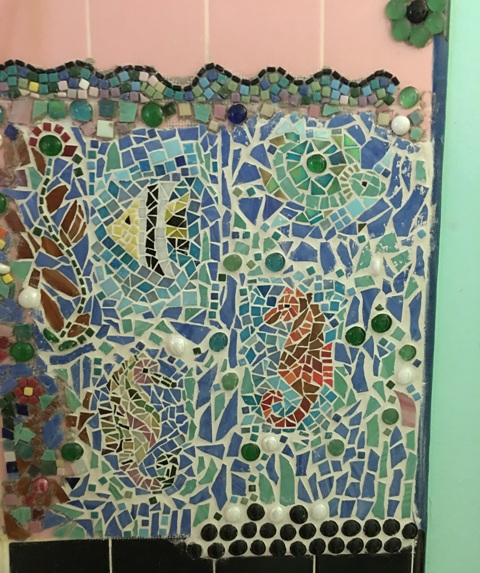 As an afterthought, I decided to make a wavy border at the top. At first it kind of bugged me that the waves weren’t exactly even, but then I thought, ocean waves are not all the same either. Plus, the key word is whimsical.
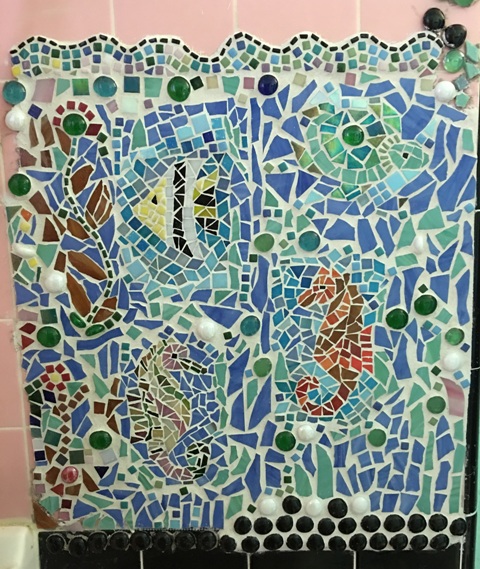 This is what it looks like right now. The left hand border and the bottom left corner still need to be finished, as does the very top right. Once that is done, I will have to figure out what grout sealer I should use on it. So for now I can’t get it wet.
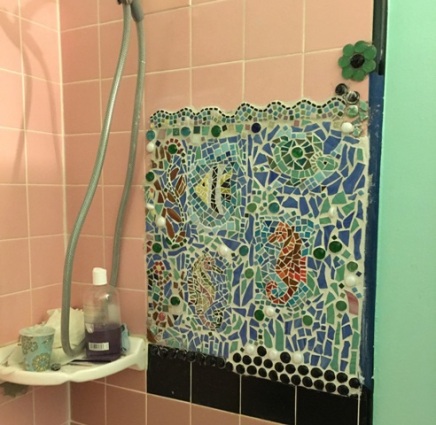 This one gives you a little more perspective as to where exactly it is in relation to the shower, though I hadn’t taken the blue painter’s tape off the right-hand border yet. And there is a green glass gem flower covering another imperfection in the pink tile, that in retrospect looks a little out of place. I was going to go all the way to the corner with the mosaic, but decided to stop at the soap dish. But now I’m pretty sure I will eventually start thinking it would look better if I did…


So now you know the answer to why I would do something like this to my bathroom tile.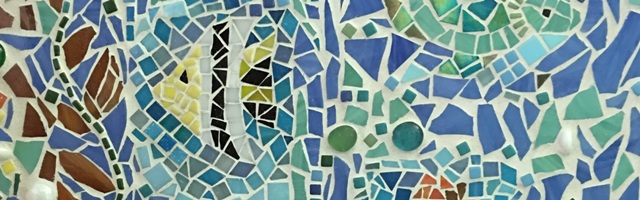

I love this. Pity you live so far away, I’ve a couple of areas in my bathroom…
Lol thanks! 😋 I am getting some ideas for the opposite wall now🐠🐬🐳
Looking forward to seeing them. Maybe there’s a character in there I can use? An octopus guarding the gold? Just kidding!
Lol it sounds like something for Sam and the Porcupine. Or maybe Johannes? My great grandfather’s name was Johannes as a matter of fact…🤔
Your creativity is lovely, I like it!
bye, Yvon
Thank Yvon! I’m glad you liked it😀
You are so incredibly talented and creative, I ‘d like to be like you if I ever decide to grow up!
Sent from my iPhone
>
Lol thanks! 😋
It’s fantastic! What a wonderful way to liven up your bathroom 🙂
I love your attitude – because I can. So true!
Thanks! I’m tossing around ideas in my head for more sea animals 😋
An octopus might be fun 😄
You’re right! And believe it or not I printed out an outline of one the other day but I haven’t gotten around to making it yet. Now I’m inspired to get him done! 😀
Fantastic! I’m just about to head over and read the update 🙂
Beautiful work! The aquatic life is so awesome! I really love the seahorses!
Also, when people ask me why? I always say… Why not? lol
Thanks! I decided to expand on it, so now I have 6 or 7 more sea animals up. I still need to fill in the spaces between them and grout them, but I think it will be time for “Part Two” soon! 😋🐠🐳🦀
If I was you, I would be jumping up and down with joy at how perfect, cheerful,and professional your mosaic turned out. Bravo!
Hi Patty! I just realized I never replied to your comment. I’m glad you like it. We’ll see how professional it is when it’s all sealed and water gets on it LOL 😬
It is beautiful!!!!
Thanks!