
Over the summer, a friend gave me a teacup.


It was her favorite teacup, but it had cracks in it and couldn’t be used anymore. Since I was getting into mosaics made out of broken china and stoneware, she said maybe I could break it and use it for something.  I knew I wasn’t going to just break it and use it for some random project. So I kept the cup on my kitchen counter for a few months until I figured out what I could make out of it. The plan was to give it back to her as something new. Finally, as Christmas approached, the idea came to me.
  I imagined a beautiful tea tray with the floral pattern of the tea cup in the center. I had read where you are supposed to put tape over the pattern you wand to preserve, and that way when you break the china, you will know where to place the pieces in your mosaic.
 You might be able to see the tape in this picture. The first thing I found out was that this, being real china, was too thin to be cut by my tile nippers, and so I had to more or less smash it after all. (This was before I figured out my “hack” for cutting too-thin mosaic tiles, explained in “Piece By Piece”.)
 The next thing I found out was that you can’t take a rounded object and expect the pattern on it to lie flat on a surface.
You remember these world maps from school, that show how a globe would look if it were laid flat. Well, that’s what was happening to my flower pattern. It wasn’t the same as reproducing a pattern from a flat plate. It wasn’t long before I realized I was going to have to abandon idea of reproducing the flower pattern altogether.
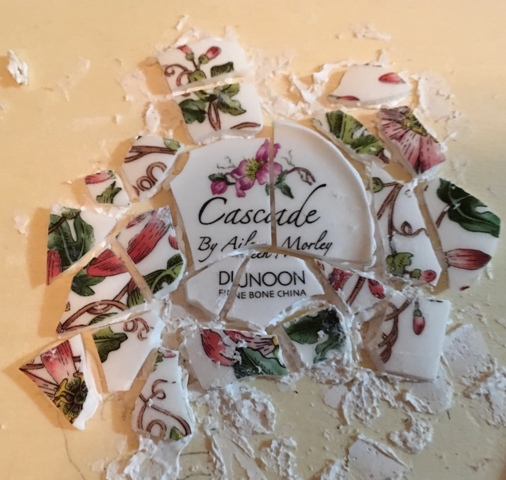 So I decided to put the bottom of the cup in the center and just randomly arrange the pieces around it. Even with this idea, the cup had been so rounded that pretty much all the pieces were curved, and didn’t really lie flat.
 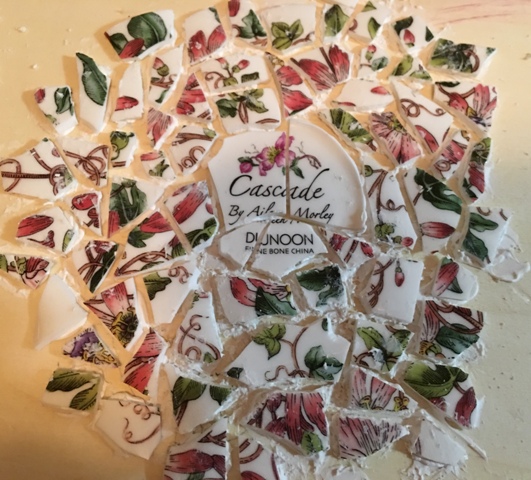 Gradually the design began to emerge.
 It ended up looking vaguely like a star pattern. Since I knew my friend liked my glass gems, I experimented with where to place them.


There weren’t enough pieces from the cup to cover the tray, so I went to the thrift store and got some plates with Christmas designs around the edges. Eventually it was time for the grout. You can see how uneven the surface was, but there was nothing to do but continue…


I had used some white, non-sanded grout that I already had “lying around” outside, but when it dried, it began to crack. (I learned later that this happens when you add water to grout that has started to dry, which is what I had done. Who knew?) So I bought another small container of powdered white grout that turned out to be sanded. It had said nothing of sand or lack thereof on the package. Not willing to A) give up, or B) go in search of non-sanded grout at more craft stores, I just used it to cover the whole thing with a second layer.


Throughout this whole process I was texting Christy for advice. The star pattern wasn’t as visible after the grout was applied. I tried tinting some grout pink and applying it to the center. I also figured out why the design looked “off” to me by editing the photo with yellow lines. No matter how hard I tried, I could not get the look I wanted. even moving it to Foster’s windowsill shelf for natural light didn’t seem to help. I had painted the tray first, which was probably a mistake, because as you see here, I got a lot of grout on the sides.
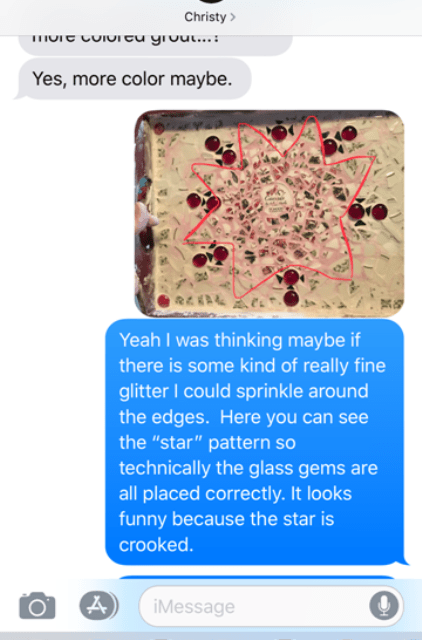 More texts and photo editing ensued.
 I finally decided to paint the outer edges of the grout and keep the center “star” the lighter pink color.
 I used the same paint on the grout that I had used on the tray itself. (I think was the leftover paint from the file cabinet in “A Pinterest Project With a Purpose”.) Not having studied up on what kind of paint you are supposed to use on grout, I basically just hoped for the best.
 Finished at last! The rest of the above text says that painting the grout the same color as the tray took care of the possibility of getting the burgundy paint from the edges of the tray onto the white grout. Finally the day came when I was able to present my friend with her new tea tray.
 Because “The Tray” didn’t turn out the way I had originally wanted it to, I had a hard time “warming up” to it and was a little afraid my friend would feel the same way. But if you think about it, since no one else is “inside your head”, the viewers or recipients won’t have your original “vision” of the piece to compare the finished product with.
  It turned out my friend was very happy with her tray, and invited me over for tea just so we could use it. With her beautiful Christmas decorations, and Swedish polka music playing in the background (in honor of my having been “raised by Swedes”), the atmosphere was perfect.


So beautiful and thoughtful of you too!
Thanks!
Love it!
Thanks!
All that hard work really paid off in the end. It looks great!
Thanks! I’m glad you liked it! It was a true “trial and error” project lol
I love it! Using a darker grout makes light tiles really stand out, and I love the colour paint you chose.
We learn so much as we go along, often by trial and error lol.
Thanks! I’m glad you liked it!
Charlee: “What a beautiful use of a broken teacup! Very pretty!”
Chaplin: “Hey the next time you need something broken deliberately and don’t want to do it yourself, let me know. I’ll come over and push it off the counter for you.”
Great work! I love how you go through your entire process and share the hardships you come across as you create and overcome them! I’ve always been interested in mosaic but have never played around with it. One day, I know I will and when I do I have a lot of insight because of your posts! Thank you! Beautiful work, as always!
Thanks! I’m really glad you liked it! I always liked looking at those blogs where they show you how they did things step by step. I never thought of trying mosaics until I did my first one, which was “The Sago Palm Pot”, and that’s when I discovered that I really enjoyed it! 😀