
You might remember that in October I did a post about my brand new “Talavera” stepping stones. Well, I sprayed them with a clear acrylic coating and put them out in the yard…

…where they promptly faded! (Note: Remember, this is California at the end of a five year drought. So the grass actually looks pretty good, if you keep it in perspective.)


This week I decided to take them off the grass, clean them up and paint them over again. I bought a heavy-duty sealer to spray on them afterwards, and decided not to put them back in the sun.


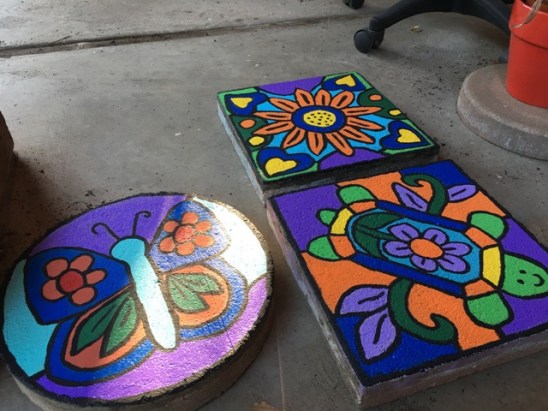
Here they are in various stages of completion. I changed a few of the colors while I was at it. And since I had to paint over the turtle’s face, I couldn’t get his expression exactly the way it was before. (I thought I would be able to see the black under the green, but anyway. I think he’s still cute.)
 There was even a bug who tried to help out.
 My usual helper was in the house, supervising from a distance.
This is how they looked after being sprayed three or four times with the Rustoleum Ultra Cover Clear Gloss that was recommended to me by the guy at the hardware store. I think pretty soon they are going to start hiding when they see me coming into the hardware store. It’ll be like, “Hey Joe, here comes that crazy lady again to get materials for some new DIY project! I think they’re calling us in the back…quick! Before she sees us!”

Okay, enough about that. After refurbishing my old stepping stones, it was time to start on the new ones I’d had in the garage all winter. I used some exterior house trim for primer. Then it was time to whip out the Sharpie pen.


I want to mention here, as I did in my first stepping stone post, and in the one about my Talavera pots, that this is not an exact science. At least not for me. I’m sure there are many people out there who painstakingly plan their designs in advance, but I’ve never been one of them. Remember, the word is whimsical, right? Plus you are going to paint over it anyway.


 Dolphin in Progress. (Go learn what that means – LOL)
 Finished! Now it just has to be sprayed with the clear gloss. Right now my idea is to make a whole bunch of them and place them in the breezeway where they won’t get direct sun (and where I won’t trip on them either!)


Below you can see a few more pictures of how my “whimsical garden” is progressing.


Well, more on this later! Right now it’s nap time!

